Pages

Showing posts with label PeachesMcGee. Show all posts

Tuesday, May 31, 2016

Bookmark This!


It seems that I work all the time now.  My job is full-time, Peaches goes to school about 20 minutes away and I still take care of the house and the cooking.  I've found myself a little down in the dumps but yesterday, I made a simple bag for Peaches' blocks and realized that I need to create something...anything to help my mental state.  


My journey out of the stay-at-home blues started with a mission to recreate Martha Stewart's crafts which eventually led me in all the right directions to start creating my own items for sale.  Now, I'm going back to that model and I'll be trying each of the following projects from this website:


And I'm also going to time them and see if they really are "sewable" in under the alloted time they state because you know I'm a stickler for those who brag about time and ease of projects (read: Martha Stewart).  

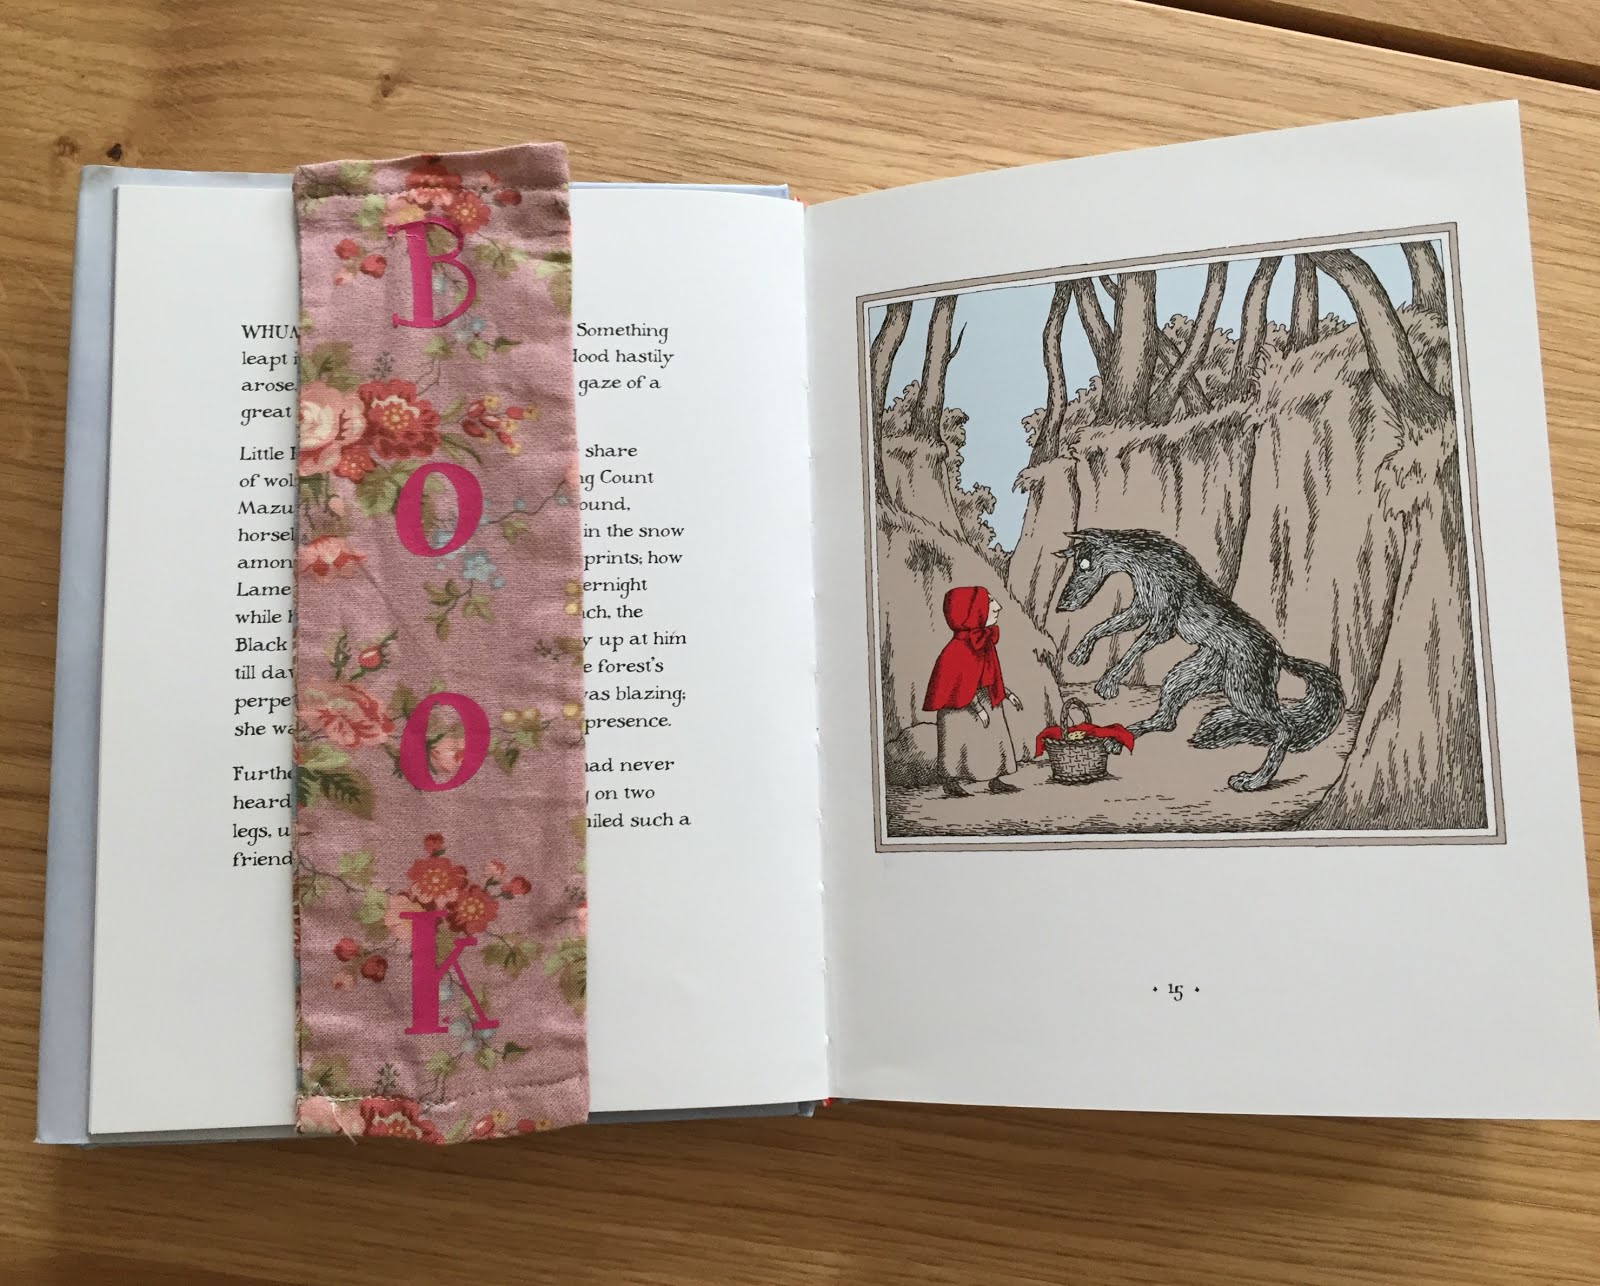
First Up - a "5-minute" bookmark that I plan to make for Peaches who is an avid reader and has graduated to books where she actually needs a bookmark.

Supplies:
  • Scraps of fabric
  • Small piece of elastic (hers was 1/2 inch wide but as she states really, most any width will do)
  • Sewing machine
First I asked Peaches which fabric she wanted and let her know that she could have two so that it would be reversible.  After some careful coaching thought, she chose these two:

Fun fact - the first pennant flag that I ever made for Milla was with this fabric

I then sent her upstairs for her daily "quiet time."  Seriously, this kid went from sleeping 14 1/2 hours per day (including a 2 hour daily nap) to only 12 - 12 1/2 hours now that she's in kindergarten and gets home too late, so for the sake of everyone's sanity, she needs this quiet time. Plus, it's only for an hour which should give me plenty of time to make the bookmark.

I started the timer on my phone and cut out the fabric a little smaller than she did (3" by 9"). I then used a straight-stitch on my machine with the two right sides facing each other.  Of course I screwed up, and had one on the wrong side, but I stopped the timer since it wasn't fair that I was the idiot.  

After ripping the stitches (my seam ripper gets some serious usage), and a few profanities, I got started on the project again.

I then turned it inside out, pressed it flat and pressed under the edges so that I could sew in the elastic (seriously, if you want the step-by-step, check out the original: http://crazylittleprojects.com/2014/07/bookmarktutorial.html

After sewing in the elastic, it looked like this:

And the timer that does not lie, said this:

Close, but no cigar my friend.  And I even HUSTLED.  

But me, being me, I had to personalize it for Peaches. Using my Silhouette Cameo, I cut out the words "Milla's" and "Book" on Heat Transfer Vinyl and made it a bookmark just for her.

Finished product - cute.  5 minutes?  Nope.  Would I do it again?  Probably not!

Front of bookmark (Milla's)
Back of bookmark

Tuesday, March 31, 2015

Pin the Tiara on the Princess


I've got a post that I'm super excited to share because I think it could be the start of something awesome.  Like, maybe I'll see it all over Pinterest.  Or maybe I won't, but I'll share it anyway.

So, I have seen people pin posts from blogs about "engineering prints" or "engineering copies." Basically, it's a huge paper printout of a picture that costs less than $10 because architects and engineers use them for their plans (sizes as big as 3 feet x 4 feet).  Well... I thought to myself, "Why not print out a picture of Peaches McGee and have them play a version of "Pin the Tail on the Donkey?""

Peaches decided that she wanted a princess tea party for her 5th birthday party, so I decided to use cutouts of tiaras to pin on the princess!  p.s. I'll be blogging about her party next month 

First, I uploaded this picture that her first babysitter took and had it printed at Staples.com. It cost me a whopping $8 or so.  


Next, I was going to use my Silhouette Cameo and cut out tiaras for all 13 of the girls. Instead, it occurred to me that the cupcake wrappers that I had bought were a) pink, b) tiara-shaped, and c) pre-made.  I love me a shortcut!

I then blindfolded each of the girls, twirled them around twice, and let them "pin the tiara on the princess."  To affix the tiara to the picture, I simply used a little piece of double-stick tape. I forgot to mention that  I placed a cupcake wrapper tiara on the picture beforehand to use as reference for where the kids should aim. 


After all the girls went, this is what it looked like (not including my favorite one which wound up on the opposite wall).

It was super fun, and the girls loved it!  It got me thinking that you could do so many other things... pin the mask on the super-hero; pin the wand on the fairy, etc.

Saturday, March 7, 2015

Pin 'M'e up!


On display in Peaches' room
A long time ago, and I a mean, loooooong time ago, I bought a piece of "art" from a local craft store that was on clearance.  I didn't care at all for the picture in it, but loved the frame and at $5, I couldn't turn it down.  

Fast forward several months (or perhaps a year), and I decided it was time to put that baby to use after I found this cork board 'M' on clearance at Fred Meyer's.  We already know that I can't say no to any 'M.'  God forbid Peaches forgets what her name begins with!

Cork board 'M' that Peaches already used to display her art
  The frame had hideous little "sequins" all over it, so I started by removing them.
Frame with the sequins removed
I then realized that I had thrown away the "art" and no longer had a backing to use.  Off to the craft store to buy some corrugated cardboard to cut to size.  

No reason for choosing pink - it was just all they had!

I took a couple of quick measurements by flipping over the frame to see what size the cardboard needed to be to fit it.  Once I cut it, I covered the cardboard with the fabric I had chosen.  I used Elmer's Craft Bond Spray Adhesive, but in hindsight, I would've used something a lot stronger like 3M Super 77 - that stuff really works!
Fabric for covering the cardboard

I used this spray adhesive, but recommend something stronger
The toughest part of covering the cardboard is making sure everything is smooth.  Just keep at it!


After the cardboard was covered, it was time to attach it to the frame.  I simply used a staple gun and I love the one that I have - it makes it so easy!  I just made sure to have one side of the staple go into the cardboard, and the other one in the frame.

You can see one of the staples - one point in the cardboard and one point in the frame
Next came time to add the 'M' to it.  The letter actually came with a couple of Velcro dots, but it wasn't strong enough to stick to the back, so I used good old Alene's Original Tacky Glue which always helps in any crafting situation!
The Velcro dots the letter came with
Alene's Original Tacky Glue to the rescue!
And that was it!  I used a nail to hang it up in Peaches' room and she loved it!

The finished project in my craft room

Peaches loves it!


Saturday, January 31, 2015

Spirit Fingers


It's Super Bowl time here in Seattle and there is nothing like it.  The city is electric and everyone is representing in Blue and Green! GO HAWKS!

Earlier in the season, we were at Peaches McGee's cousin's house watching the game and these people with silly pom-pom gloves appeared on TV.  Someone commented on how cool they were and I (stupidly) blurted out, "I'll make a pair for everyone if the Seahawks go to the Super Bowl."  

Cue the pom-pom sweat factory.

I asked the hubby to pick up a few pairs of gloves since apparently it's difficult to find them in most stores in January (WUT?!) Okay - I may have only gone to one store, but I hate shopping! 

He came home with three which was a huge relief - only 30 pom-poms to make.  Wait, did I say ONLY 30?  That's what I thought until I felt like my fingers were going to bleed after making 32 (of course I ruined two in the process of sewing them to the gloves - grrrrrr.)

Here are the supplies and instructions are below:


Instructions:
  • Send husband out to buy gloves because you can't stand going to more than one store

  • Make a pom-pom for each finger - I used a pom-pom maker like this one and a video tutorial on how to use it may be found  here.  Make more than you need... you WILL ruin at least one of them. 
 

  • Sew the pom-poms to the mittens with embroidery thread that matches the color of the mittens.  I sewed through the pom-pom from top to bottom and then attached it to the mitten by sewing through the tops of the fingers (without a an actual finger in them).  There's a seam there already, so it doesn't add any bulk and looks seamless (no pun intended).
  • Make your child model them even those she doesn't want to!


There you have it; now you have the ability to cheer with your fingers!


Friday, February 7, 2014

Marquee me!


While perusing Pinterest, I saw something that I had to make (I say that at least twenty times a day).  She made it look so easy and the results?  Amazing.  Well, I'll agree that the results are pretty amazing, but easy? Mmmm... no.  

Check out her instructions here (because unlike some other bloggers, I truly believe in giving credit where credit is due and this was NOT my invention).  

Here's what I learned and I hope may help you in recreating this project...

Instead of tracing your computer screen (yes, she actually advises doing that), if you're lucky enough to have one, use your Silhouette Cameo/Portrait to cut out the letters with standard 12x12 scrapbook paper.  I used the font: Bready Regular Demo which can be found and downloaded for free here and I enlarged it to 900 font size.  Please note that you may have to weld certain letters - for example 'M'.  I did everything in capitals because I didn't want to have to deal with the dot over the 'i'.

Also, don't worry about using cardboard for the letters, just pick up a few extra pieces of white poster board.  So much easier to cut than cardboard!  Furthermore, if you have the smarts and ability to use your Cameo/Portrait, go ahead and use it for this as well.  I tried but the poster board kept slipping around and rather than throw the thing out the window, I decided to trace around the scrapbook paper letters. I then cut slightly inside the lines because you want to make sure that the poster board doesn't poke out from behind the pretty paper.

Other than that, I'd say the tutorial is pretty self-explanatory.  However, I will not gloss over the fact that it is super, duper annoying and irritating to determine where to place the 100 bulbs.  There's no mathematical equation that can be used because each letter is a different size.  So, I just had 100 small square pieces of paper cut out using my Cameo and then placed them around the letters until it looked about right.  The problem is that they're so small, that you start losing them and then have to count over and over and over again until you're sure you have exactly 100.  

I used the same lights she recommends which can be purchased on amazon.com here.  Call me a helicopter mom, but I wanted to make sure that the poster board didn't catch on fire in my sweet girls bedroom right above her bed.

Peaches McGee loves her lights and will show just about anyone willing to go up to her bedroom.  She even erased the next 30 minutes of potentially irritating behavior by saying, "Thank you momma! I love how you decorated my room."