Pages

Friday, June 15, 2012

Don't Be A Card!


My blog has been neglected… but I have to prioritize things now that I’m a working mom.  Needless to say, I haven’t been able to craft like usual, but I haven’t gone completely into hibernation!

For Mother’s Day, I decided to tackle the button-embellished cards craft from “Martha Stewart’s Handmade Holiday Crafts.”  It was another one of her crafts where she has one picture and it’s not even of the completed project!  It’s in progress, so I guess you just have to imagine what the final product looks like.  Grrrrrrrr.

I have a ton of really cool buttons thanks to my husband’s grandfather’s second wife (did you get that?), whose house we now live in.  They’re all from the 50s and 60s and as it’s been said before, things really were made better back then.  The quality is incredible and the details are so intricate (not to mention the vibrancy of the colors!).

I decided to make four cards… one for my mom (of course), my mother-in-law, my sister, and my sister-in-law.  I didn’t quite anticipate the time it would take, so I may or may not have been scrambling to finish them the night before Mother’s Day.

Here are the supplies that I used:
Clockwise from bottom left: green embroidery floss (for stem), micro-hole punch, double-sided tape, ribbon, pen for personalizing (not required), pencil for sketching out where to sew, decorative scissors (not required), white embroidery floss for attaching buttons


Here are the steps (in my own words):
  1. Cut a piece of card stock in your choice of size and color (but please make sure that it will fit in an envelope if you choose to use one).
  2. Cut another piece of card stock in a contrasting color, smaller than the other one.  I used decorative scissors for a fancier look.
  3. Place your buttons how you would like them to appear on the card.  I used three for each card, but in Martha’s example she uses six (or possibly seven because it’s not a final project, so we just don’t know!). Use a pencil and then trace dots where the stitched stems will be.  It’s also helpful to use a needle to poke holes along the lines – though to be perfectly honest, I didn't do it because I didn’t read this until putting together this blog entry.
  4. Using embroidery floss, attach the buttons to the card.  Then use green floss, embroidery floss that is, and stitch the stems using a running stitch. 
  5. I used a micro-punch to make two little holes for the ribbon to tie the “bouquet” together.  Then I threaded a small amount of ribbon and tied a bow.
  6. Use double-stick tape (or glue if that’s what you have) and attach the embroidered card to the larger card.

 Here are some more pictures:


Some other things that I made…

I found this cool item on Pinterest (surprise, right?) and it’s a booster chair for the kiddos using a vinyl tablecloth!  

I purchased two vinyl tablecloths last year thinking that I would make bibs out of them, but decided against it, so I had two cloths to choose from.  I wanted to test out the pattern first and see if I liked it before cutting into the second tablecloth, but now that I’m done, I think I’m going to make another!

Here are the instructions, and here are my results:

\


I also finally completed the 4th of July Topiaries that I started on LAST YEAR.  It’s a tedious task… you cut off stars from a garland, then take dressmaker pins and pin it around the topiary form.  I love how it turned out, but good GOD did it take a while.  Of course it would have been easier to do just one, but I have two for all of the major holidays, so I had to do both…

Garland and some of the stars I cut off of it

Dressmakers pins

Close-up of topiary ball... yup, that's a whole lotta pins in there


Tuesday, April 24, 2012

Someone Needs a Crane-iotomy… And For Once it’s Not Me!


With joy in my heart, I write this blog entry knowing that it may be a while before I write another.  I was just named Executive Director of the CLP Foundation and I couldn’t be happier.  I worked really hard to obtain my CLP (Certified Lease Professional) several years ago, and now I get to return to an industry that I love and an incredible group of colleagues that I missed. 

On to the project.

I buy a book… a big, expensive book.  It’s called, “Martha Stewart’s Encyclopedia of Craft:s An A-to-Z Guide with Detailed Instructions and Endless Inspiration.”  She has the audacity to include a paper craft on cranes?!  Origami cranes?! 

A little background.  In third grade when I was in Mr. Higa’s class (RIP Mr. Higa), we made origami cranes.  Whoever made the best one got to go around to the other classes and teach them how to do it (we were attempting to make one thousand cranes at T.T. Minor).  Being the perfectionist that I am, I wound up winning and got to teach everyone how to do it.  Wow.  That really sounds like I’m bragging, doesn’t it?  I guess I am. 

But that was third grade.  This is big girl’s life and why in God’s name is there a craft for making origami cranes?  Am I mistaken, or does the title include, “Endless Inspiration.”  Really?  I buy an expensive book to learn to make origami cranes? 

Alas… my response was to make it with pirate cardstock.  I’m such a rebel badass.


However, I had more projects to keep me busy.  First, the crayon roll.

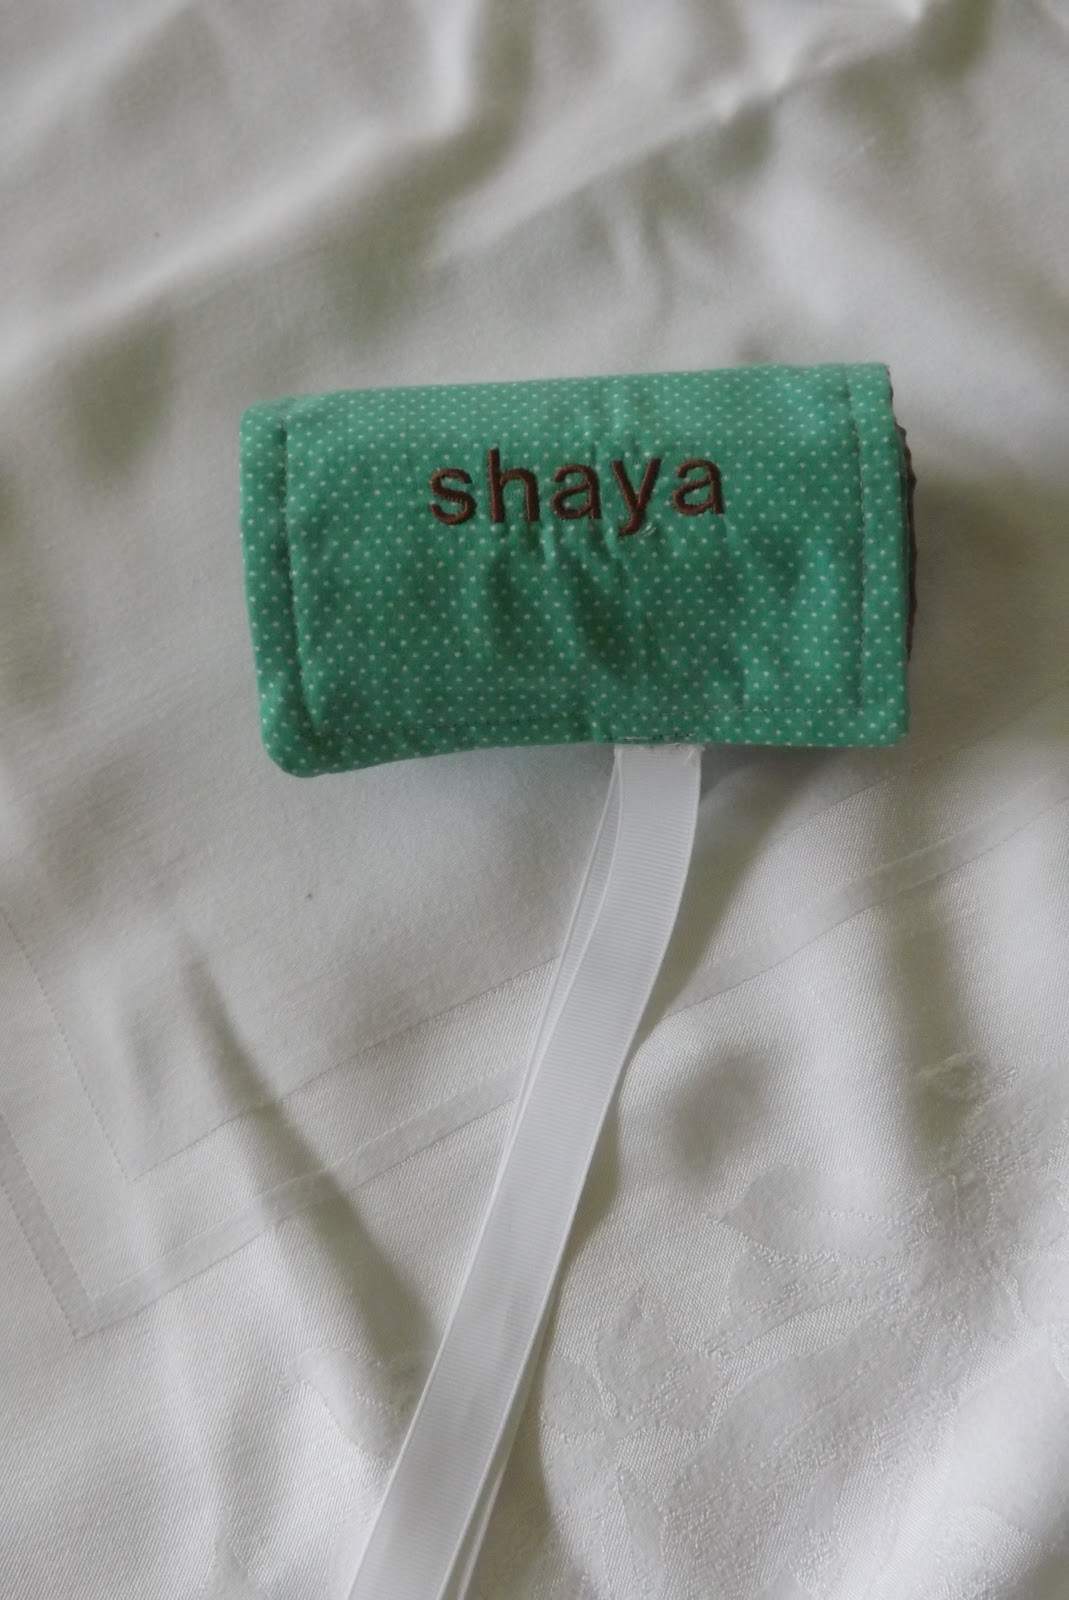
It’s not exciting; nor is it sexy (that’s the word that everyone uses now for everything, including food).  But it is useful and I think it’s pretty cute.  I used this tutorial but before sewing the pieces together, I embroidered “Shaya” on it (the name of the adorable little girl that I made it for).


I also made some monogrammed napkins for my friend Shelby who just purchased a beautiful new house with her husband.  I love the colors of khaki and black together, so when I found the khaki napkins, I had to use black for the embroidery.  She kept her name and while I was tempted to use their ‘made-up’ joint name (Montsworth), I refrained and used the first initial of each of their last names. 


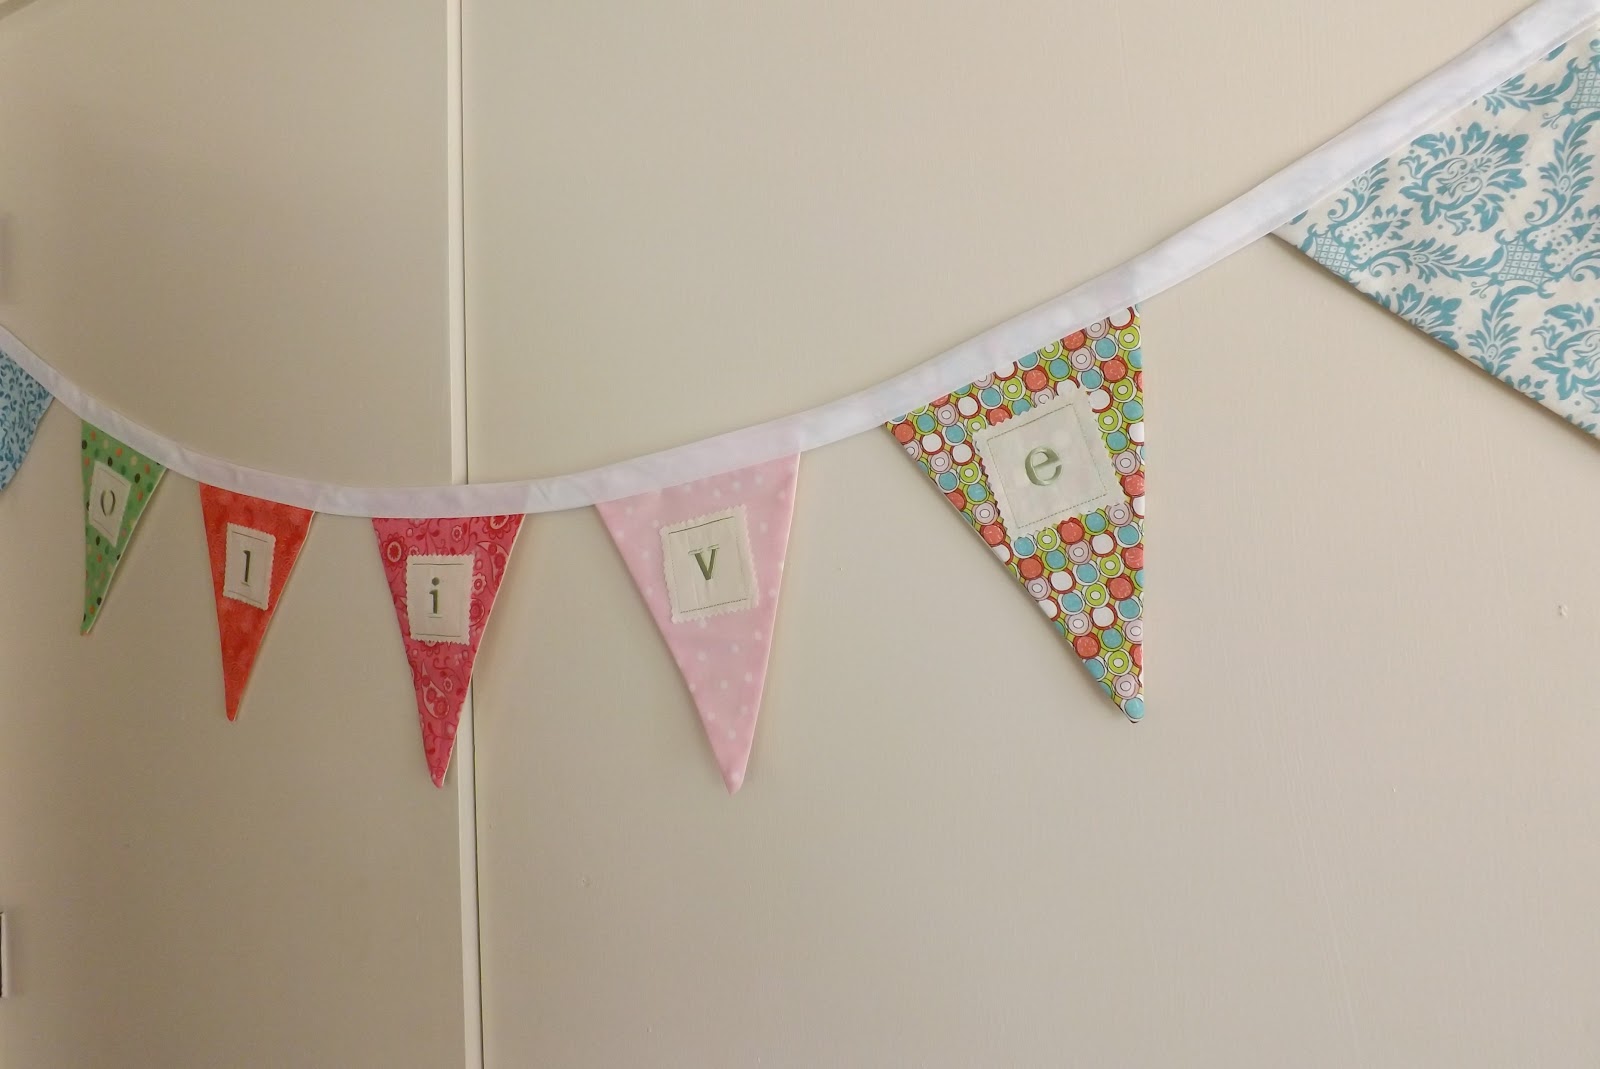
Lastly, I made two more flag pennant banners for two of the cutest little girls, Olive and Kenley.  Their mom consulted with me beforehand and didn’t want a contrived look, so I used a different piece of fabric for each flag and different colored embroidery for the girls.  I love the look!


Sunday, March 25, 2012

It Takes Two...


2 years ago... March 17, 2010


Peaches McGee made it to two years old. I'm not sure what it means when my doctor (and Peaches' doctor as well), pats me on the back and says, "Congratulations Mommy.  She made it to two."  


With this huge "milestone," I wanted to throw a special party for her.  Something small, simple, not too complicated.  


45 people later.  Yes, I said 45.  


It all started with an invitation that I created.  I channeled the inner graphic artist in me, instead I found a former Marketing Manager with only Microsoft Publisher to edit it.  Alas, I got as creative as I could with my beloved Chevron print, then printed it on white cardstock, and fastened it to a piece of green cardstock with a square brad.  
Publisher File
Don't worry, I did include my address and RSVP information; I just don't need to share it with the world :)
My theme was set!  


Who am I kidding?  After having a baby on St. Patty's Day, I decided that I would take advantage of this theme until she is old enough to give me a different one.  Does that mean one or two more years of this theme?


I had many grandiose ideas on what I would do in terms of decor, food, ambiance, etc. but I planned the party for a day and a half after we returned from Mexico, so only a few got done.


Here's one that I did... water bottle covers.  


What's the point?  Who knows, but they looked cute, so I did them.


I downloaded the template from HowDoesShe.com - and printed them on white cardstock, cut them out and then glued them to the water bottle with a glue gun (I used my cool temperature glue gun so as not to burn a hole into the bottle!)


I also made some marshmallow pops.  Inexpensive and tasty (though not recommended that children have more than one - I know of at least two children who couldn't nap after the party) 


To make them:

  1. It's probably easiest to use proper lollipop holders, but I didn't make it to the craft store in time, so I took wood skewers and used tin snips to cut them into thirds.
  2. Insert skewer into the top of a marshmallow 
  3. Dunk about 1/2 of the marshmallow in a glass of water
  4. Roll the sides of the marshmallow in green sprinkles/sugar that has been poured in a thin layer on a plate

For some entertainment, I wanted to do a guessing game, so I bought a five pound bag of Gummy Bears at Costco and separated the green gummies from the rest (so much for equal gummy rights).  

I counted the green gummies and then created a form for the guests to record their guesses.  I used the same basic graphics as the invitation:


Another form of entertainment was a rendition of the whole "photo booth" phenomenon that's going on right now.  Renting one wasn't really in the budget, so I decided to use the cream closet doors in our dining room as a backdrop.  To add some St. Patty's Day pizazz, I created three different paper bunting banners by cutting out triangles from scrapbook paper, and then punching holes and running ribbon through them.  I also provided a bunch of different props, many of which can be found at The Paper Source here:

Me and my lovely husband
Even though I wrote, "No presents necessary" on the invitation, almost everyone brought one, so I uploaded each party-goer's picture to Postagram on my iPad and sent them a thank you note with their picture.

I don't foresee party planning in my future, but this was pretty fun!


Tuesday, February 14, 2012

Quill You Still Love Me Tomorrow?


I've been focusing the majority of my time on getting my Etsy shop open (sneak preview above), so I’ve neglected my blog terribly.  Luckily (or unfortunately), three of the four crafts I undertook from Martha Stewart’s Encyclopedia of Crafts book did not exactly impress me, so I don’t feel too guilty.

With it being Valentine’s Day, I thought I would share with you the quill card that I made for my husband.  It’s my own take on one of Martha’s crafts – a quilled heart shape.

My husband and I are going on ten years of being together – five of them as husband and wife.  I decided to make ten quilled hearts in gradually larger sizes signifying how my love for him has grown over the years.  Under each heart, I noted the year and then I glued them on a white card with debossed hearts on them. 

The only supplies I needed were:
  • Card stock
  • Rotary paper cutter
  • Quilling tool


You make the hearts by using either quilling paper or if you’re cheap like me, making your own with a rotary cutter.  I made each strip 3/8” wide (totally arbitrary) and then folded it in half and rolled the paper towards the fold using the quilling tool.  To make smaller hearts, I cut off more and more from the length of the paper strip.

Here are nine of the ten hearts.  


I was originally going to do one heart per Valentine’s Day that we’d been together, but after I attached the hearts to the card and started writing down the years, I miscalculated.  Of course I did.  Hence, TEN hearts and making it more about the years we’ve been together.  Nothing like a good, creative story, right?

Here is the card that I already had on hand, but really any card would work (besides, you can't really see the debossed hearts, can you?)


I glued down the hearts with Elmer’s glue (put a little on the back of the heart and then hold it in place until it’s dry enough to keep its shape). Next, I took a colored pencil and shaded over the debossed hearts and took a fine point black pen and wrote down the years we have been together.  Note, don’t be stupid like me and miscalculate.

I love it when things turn out:


My other three projects involved creating flowers out of paper.  The first one I undertook was supposed to be a rose using the quilling technique – it sounded so elegant in her book, “Quilled-Rose Nosegay.”  What a joke.  A hideous, ugly rose that I immediately tossed in the trash after the obligatory photo.

Same supplies as the card (paper, rotary cutter and quilling tool).  The technique was different and not at all comprehensible.  I still don’t know if I did it correctly because Martha’s instructions were so inadequately described.  Here’s a link – let me know if you can figure it out, and if so, send me a picture if it looks better than this horrid thing.


The other two involved tissue paper.  The supplies:
  • Tissue Paper
  • Floral wire
  • Floral tape
  • 1” Styrofoam ball (for rolled petal flower)
  • Scissors


To make the “Curly Petal Flower,” you cut a strip of tissue paper to 16-by-3 ½ inches.  Make 2-inch wide accordion folds by first folding the paper behind the strip, then folding the paper in front of it (am I mistaken, or is this not the definition of accordion folds? Someone help me out here).  Make 3-inch deep snips in the tissue paper to create fringe, then wrap the unfringed end around floral wire.  Secure the paper to the stem with floral tape and then use that tape to wrap the wire.  Lastly, run the scissors blade along the pieces to create fringe, and fluff.


Accordion folded and "fringed"

Wrapped with floral tape

Curled and fluffed


I take that back.  Do none of the above and don’t waste your time.

But wait!  There’s more!  RIP Billy Mays.

For the “Rolled Petal Flower” project, you cut the same sized strip as the Curly Petal one above (or decide that it’s a totally stupid number and make your own size).  Make 2-inch accordion folds with the same inane instructions as above and then trim and notch one end through all of the layers (see my picture below). Insert wire into the Styrofoam ball, and place the ball toward the bottom of the strip of tissue paper.  Roll the tissue around the ball and twist at the bottom.  Remove the ball with tweezers (or if you’re frustrated like me, just stick your fat hand in there and grab it), and wrap floral tape around the bottom of the flower and stem.  Finally, throw it away because you’d be embarrassed to give it to anyone.  Thanks Martha.

Accordion fold 

Trimmed and notched per Martha's instructions


S'more.  Oops, no that's a ball with wire going through it
Pre-roll 

Post-roll with floral tape

Here's another sneak peek of one of the items I'll be selling on Etsy (note, everything is handmade by me - letters included) :)


Sunday, January 15, 2012

That's a Wrap!


Previously I mentioned my sister-in-law’s studly British boyfriend and how he took an interest in my Peaches McGee projects (at least he feigned interest, he could just be an incredible actor... Either way, he's cute and nice, so I don't care). 


Of course, I was the lucky gal who pulled his name in the family’s Secret Santa exchange, so I decided to call upon Martha Stewart's Encyclopedia of Crafts book. 

She has a craft called "Punched Flower Card and Wrapping" and it looked pretty cool… basically a glorified way of wrapping a present along with a matching card. 

For the card, I needed two contrasting, but complementary colored cards.  I chose to use a brown folded card and a tan colored note card – but you could use two folded cards in different colors.  

I downloaded the template from Martha’s website (and you can too here).  I then used Adobe to copy the image and enlarged it a little bit in Publisher.  Finally, I printed it out on regular copy paper and got to work.

I took an X-Acto knife and placed the template over the note card and used a self-healing cutting mat (why don't they make those for humans?).  


Quick interruption -  it wouldn't be a Peaches McGee project without also admitting that I was stupid and used a somewhat dull blade, so actually ruined the freaking template AND the note card and had to start at square one.  
A dull blade makes Reid an unhappy girl


Tip… 


USE A SHARP BLADE.


With that said, once I had the template cut out, I gently lifted up the “leaves” so that it gave it a three-dimensional look.  


But it looked dull and boring, so I ventured outside of Martha's instructions and decided to use my new metal letter-press set (as seen in this project).  I selected his initials (E O S) and punched those onto the card and then took a black pen and retraced the letters in order to call some attention to it.  Finally, to assemble the card, I took some adhesive dots (or you can just use glue), and put it on four corners of the floral tan note card and fastened it to the brown folded one. 


Letter-press set


Finished card


For the coordinated wrapped present, I first wrapped the box with some simple Kraft-like paper with stars on it.  Then, to make the flower, I printed out the template again, but this time I enlarged it quite a bit so that it would make a statement on the box.  The next steps are the same as for the card…
  1. Print template out
  2.  Use SHARP knife to trace around template onto coordinated paper (I selected a striped Kraft-like paper I purchased from IKEA years ago)
  3.  Gently lift up the petals to give it some dimension
I wanted it to look like one of those “bands” they place around a box at Nordstrom, so I folded up about 2” on either side of the flower and then taped it to the box.  My wrapping paper didn't make it fully around, so I taped it so that just the top and sides were covered.  


Coordinated wrapping paper

Wrapped box

Showing the "band" on which I created the flower

Finished product

I loved the finished project, but it was way more time-consuming than I think is necessary for something that is typically torn apart and thrown away.  However, studly British man did save the card, so that may just change my mind as to whether I do it again or not :)